Add Disqus Comments to Your Blog
Target
“Talk is cheap, show me the code”. Sorry, wrong script. When you blog, you hope someone will read it. When people read it with their minds, they probably will have questions. Of course, you can have people connact you by twitter. However, discussions with the readers is a part of the article, or it completes the article. So you will want to enable readers to raise their questions and record the discussion that may be helpful for future readers.
Why Disqus?
Disqus is a third party comment system. Because we are building a static website, it is out of our range to build our own comment system. So Disqus comes to help. Besides the benefits I talked in the last section, it also provides other benefits that you can only get from a third party comment system. To list just a few:
- It’s a platform that is widely used and user is familiar with it.
- It has a community and is a social network itself.
- Installing it is super easy.
- Mangage comments is easier.
- Analysis and stats for your comments.
- It’s free.
- Later on, you can insert ads in it and make money.(Of course you can choose not to.)
Embed It in Your Template
1. Set up
- Go to Disqus and register an account.
- Create a website in their system. https://disqus.com/admin/create/
- Configuration: fill in the information of your website
- Name
- URL
- Commenter Avatar
- Category
- Description
- …
-
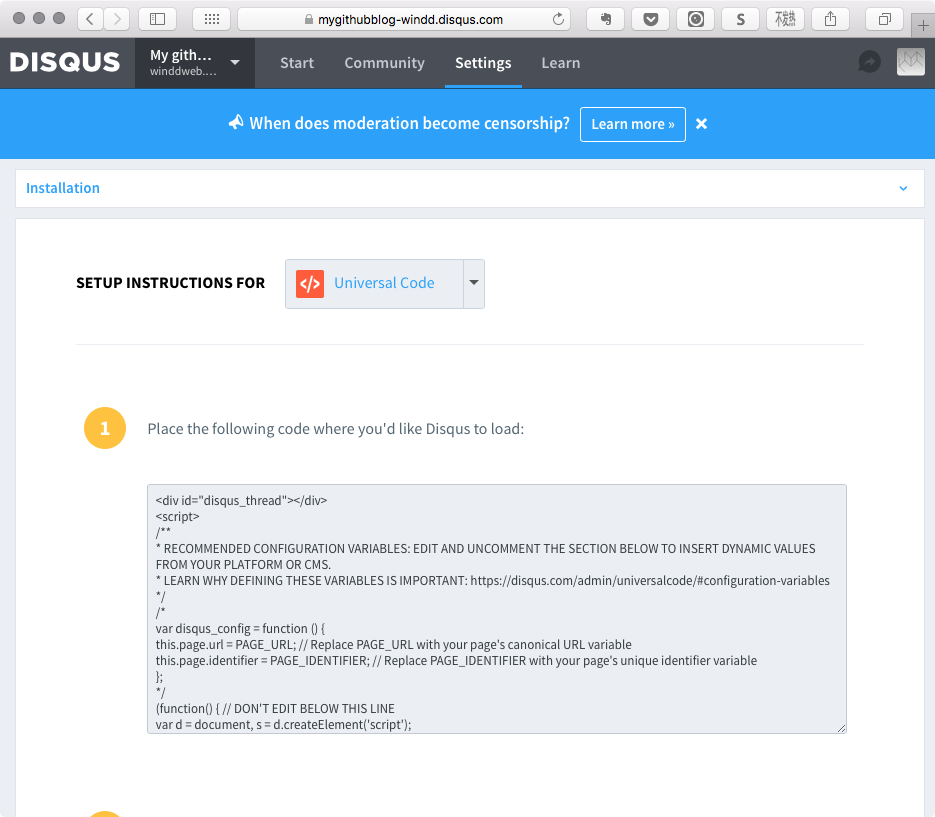
Go to installation tab and choose Universal Code

2. Add the Code Snippet to Your Template
After we see the code from Disqus, we can start integrate it into our template.
-
Create file
_includes/comments.html -
Copy and paste the script from Disqus’s example
-
Uncomment the first part of the code,
var disqus_config=... -
Edit the
PAGE_URLandPAGE_IDENTIFIER, it’s important# compose the URL from three variables, no slashes this.page.url = "https://winddweb.github.io/add-disqus-comments-to-your-blog"; # Use slugified page title as Unique ID because my blog title is unique this.page.identifier = "add-disqus-comments-to-your-blog"; -
Here’s the content of my
comments.htmlfor reference.<div id="disqus_thread"></div> <script> var disqus_config = function () { this.page.url = "https://winddweb.github.io/add-disqus-comments-to-your-blog"; // Replace PAGE_URL with your page's canonical URL variable this.page.identifier = "add-disqus-comments-to-your-blog"; // Replace PAGE_IDENTIFIER with your page's unique identifier variable }; (function() { // DON'T EDIT BELOW THIS LINE var d = document, s = d.createElement('script'); s.src = '//yourwebsite.disqus.com/embed.js'; s.setAttribute('data-timestamp', +new Date()); (d.head || d.body).appendChild(s); })(); </script> <noscript>Please enable JavaScript to view the <a href="https://disqus.com/?ref_noscript" rel="nofollow">comments powered by Disqus.</a></noscript> --> -
Add
comments.htmlto your layout file. I picked my post template_layout/post.htmlAdd this below
</article>{% if page.comments == true %} <div> {% include comments.html %} </div> {% endif %}
Add a Switch
Yes, you may have noticed that I didn’t simply {% include comments.html %}, but I added a condition depending on a variable. So you can control if a post will have comments section by setting a variable comments equal to true. If you didn’t include comments variable in your YML Front Matter, then your post will not have comments.
Here’s an example of the Front Matter for this post.
---
layout: post
title:  "Add disqus comments to your blog"
categories: coding tutorial
tags: jekyll disqus
comments: true
---
Conclusion
Disqus is easy to include and powerful to use. Try it.
OK, thank you, see you in the next one.
Customization To-do list:
- Permalink: should I contain dates in the URL?
- Fix fenced code block nested in un/ordered lists
- Fix the Checkbox
- Add images with captions to my post
- Add comments functionality
- Change a Theme
- Adding a Navigation
- Change the code highlighting theme
- Custom 404 page
- Create _pages folder for all your pages
- Add tags to post
- Change the About page
- Multilingual?
- Add search functionality